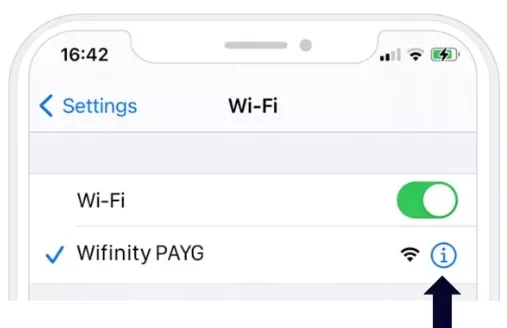
Some Apple and Android devices have a setting called ‘Private Wi-Fi Address’. This feature is switched ‘on’ with iOS 18. You can read an article about that operating system here.
It’s designed to prevent some public WiFi networks that you haven’t signed up to from recognising your phone. Unfortunately, it also makes it harder for you to connect to open WiFi networks (like ours).
The feature assigns a new MAC address every time your device connects to an open network. This makes it appear to be a completely different device every time you try and get online. It means we can’t tell if your device is yours and should be allowed on as part of your subscription.
To maintain a smooth, uninterrupted WiFi experience, we recommend that you switch this feature off.
How to turn off ‘Private Wi-Fi Address’ for iOS
- Find the ‘Private Wi-Fi Address’ option and switch it off.
- Connect to a Wifinity network.
- Go to ‘Settings’ on your device.

How to turn off hardware address for Android phones
- Settings
- Open the list of networks (the WiFi page)
- Click the settings icon to the right of our network and click advanced
- If there is no settings option, instead hold down the network name
- Check that your MAC address type is set to ‘Phone’
How to turn off hardware address for Windows 10
- Start button
- Select Settings > Network & Internet > Wi-Fi
- Turn off ‘Use random hardware addresses’
If this doesn’t work:
- Start button
- Select Settings > Network & Internet > Wi-Fi > Manage known networks
- Choose the network. It’s best to check both networks (if applicable). E.g. Wifinity PAYG & Wifinity Home Networking
- Select Properties on the network and choose the setting you want under ‘Use random hardware addresses’ for this network
- Set it to off


